How To Create A Mac OS X (macOS Sierra) VM In Your Windows PC With VirtualBox
MacOS Sierra is the latest version of Apple's operating system, which of course cannot be installed on just any computer. In order to use it, you either need to buy a Mac or build a hackintosh. But if you just want to try the Sierra MacOS, then the ideal solution is to use a Mac OS X virtual machine.
If you wish to run different versions of Windows in Virtual Machines, then the following D3K articles are worth taking a look at:
- How to add an XP Mode Virtual Machine to Windows 10 (or 8) using Hyper-V
- How to test Windows 10, 8, 7 for Free, Legally
- How to Install Windows 8.1 Virtual Machine on Windows 7
- How to Install Windows XP as a Virtual Machine on Windows 8
You can click on the links below to navigate within this article easier.
- Why create a Mac OS X Virtual Machine?
- System requirements
- Download links
- VirtualBox
- First boot of macOS Sierra
Why create a Mac OS X Virtual Machine?
There are many reasons why one may want to install a Mac OS X virtual machine. iOS or MacOS developers may need to use XCode for their applications.
On the other hand, you might own a program which can only be run under Mac, or perhaps you just want to try and see how Apple's operating system works.
Whatever the reason may be, a Mac OS X VM can solve your hands. You can easily and quickly install and use the latest version of macOS, codenamed Sierra.
The most popular free Windows software for virtual machines is VMware Player and VirtualBox. In this article we'll see how you can create a Mac OS X VM with VirtualBox.
System requirements
To create a Mac OS X virtual machine your computer must be running Windows 7, 8, or 10, 64-bit version.
As for the hardware specs, you need at least 4GB of RAM. Ideally, it's best to have 8GB RAM or more. The processor should be at least quad-core. The VM may work with two cores too, but it will be lagging quite a lot. Lastly, the processor should have virtualization enabled.
To create a Mac OS X virtual machine on a computer equipped with an Intel processor is relatively simpler than on a computer with an AMD processor. Thus, this article is only for those who have an Intel processor.
So, to sum up, here are the system requirements:
- 64-bit Windows 7, 8 or 10
- 4GB RAM or more
- Multicore Intel processor, preferably quad-core or better
If all those requirements are met, then you can follow the instructions to create a Mac OS Sierra VM.
Download links
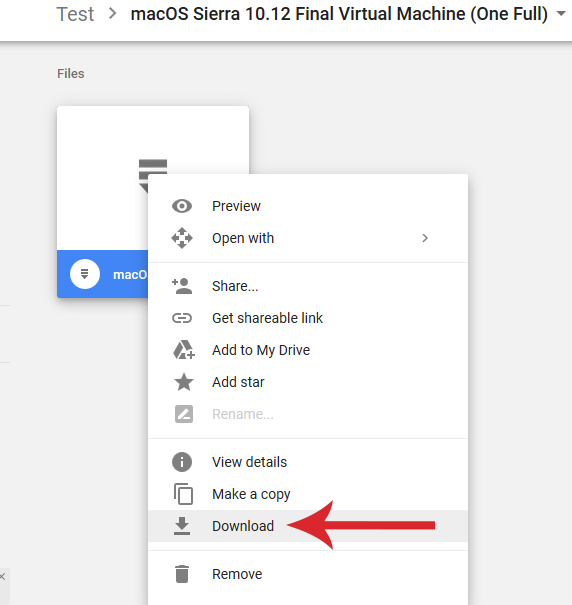
First you need to download the macOS Sierra image file, which you will use to install the operating system. So, visit this link, right-click on the file and click on Download.
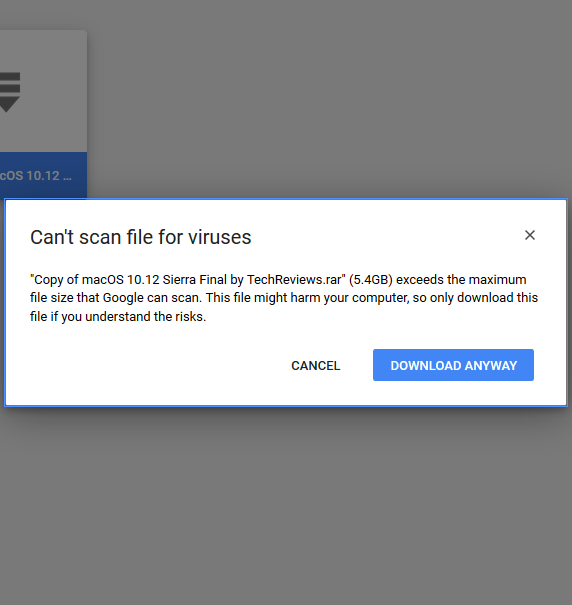
A message will appear saying that Google cannot scan large files like this one for malware, and that you should be careful. Click on Download anyway, since the file is absolutely safe and is uploaded by Techsviewer.
Then the download will begin. It should be noted that its size is 5.44GB, which means that it will take a while for the download to finish. When it’s done, unpack the downlaoded file to the location of your choice.
If you receive a message stating that you cannot proceed with the download because the download limit for the file has been exceeded, then you can follow these steps:
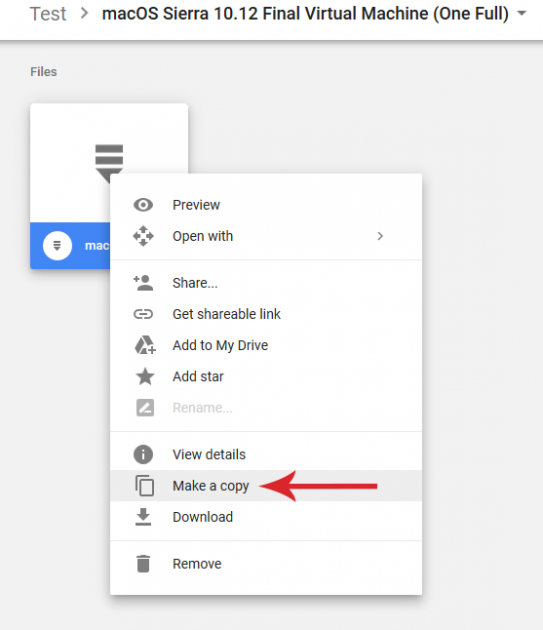
Login to your Google account, navigate to the download link, right-click on the file and click on Make a copy.
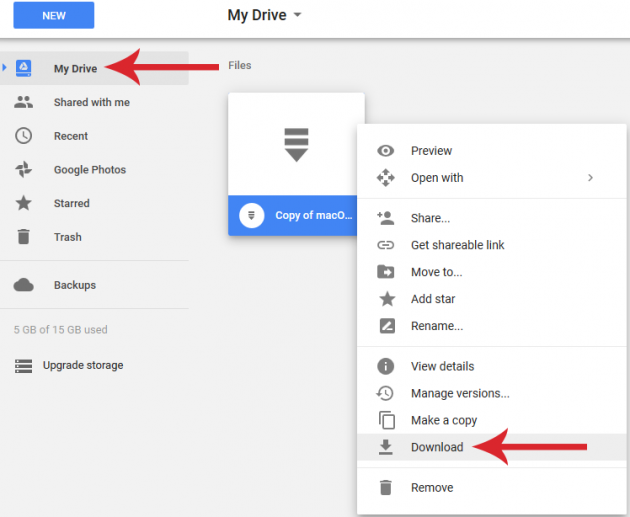
Then, navigate to your My Drive page, locate the copy of the file, right-click on it and select Download.
After you have successfully downloaded the file, unpack it using an application like WinRAR or 7-Zip.
VirtualBox
VirtualBox (mirrored) is an easy-to-use, popular application developed by Oracle that allows you to create Virtual Machines with various operating systems. It is very reliable and has countless features.
For personal use the free version is more than enough, but professionals can use its paid version instead.
Download and installation
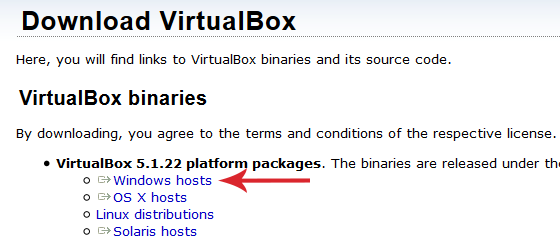
You can download the latest version of the program by clicking on the Windows hosts link that is available on its website.
After the download has finished, run it and follow the setup wizard. The installation procedure is straightforward and it contains no 3rd-party software.
Creating a macOS Sierra VM
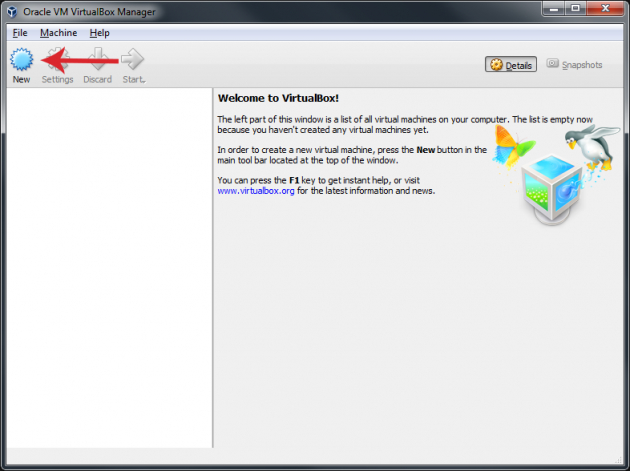
Once VirtualBox is open, you can create a new virtual machine by clicking on the New button from the toolbar.
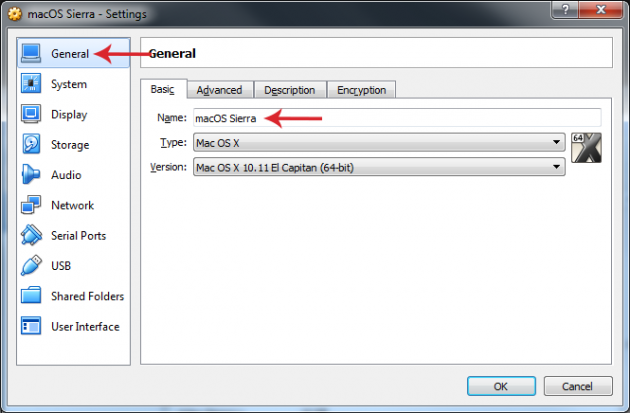
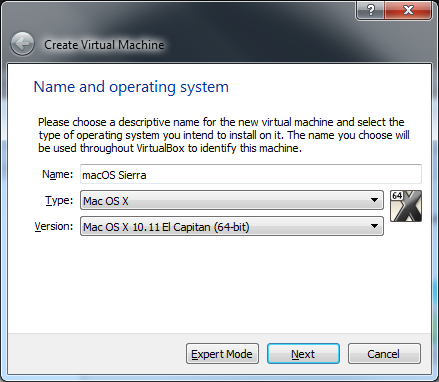
Then you can choose a name for your machine. It’s recommended to name the VM "macOS Sierra", or something among these lines for convenience. As for the Type, select Mac OS X and then, next to the Version field, select El Capitan (64-bit).
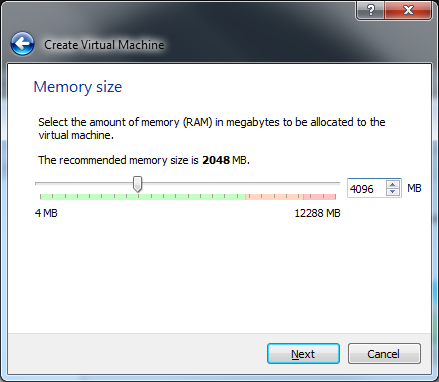
In the next screen you will be asked to choose the amount of RAM that you want to allocate for the VM. As we pointed out previously, you need at least 4GB of RAM.
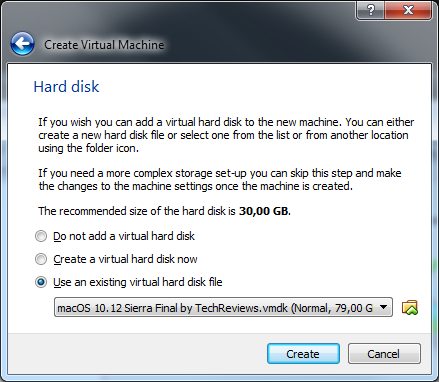
Afterwards you will be asked whether you want to add a virtual hard disk on the VM. So, select the third option (Use an existing virtual hard disk) and browse for the .vmdk file that you unpacked earlier. When done, click on Create.
Virtual Machine settings
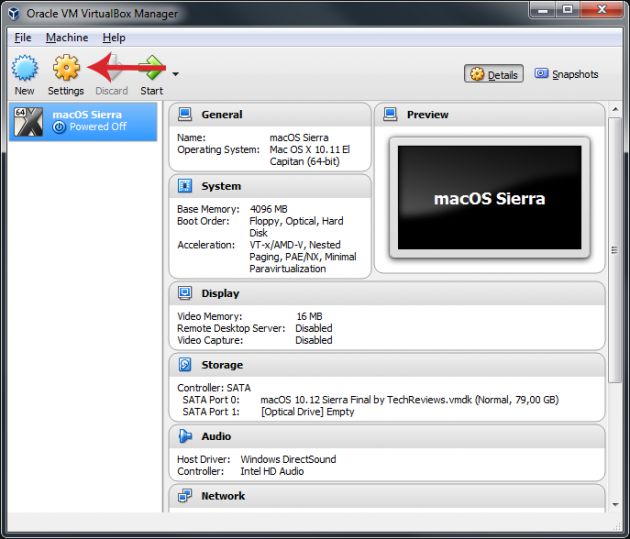
Now, proceed by clicking on the Settings button from the toolbar.
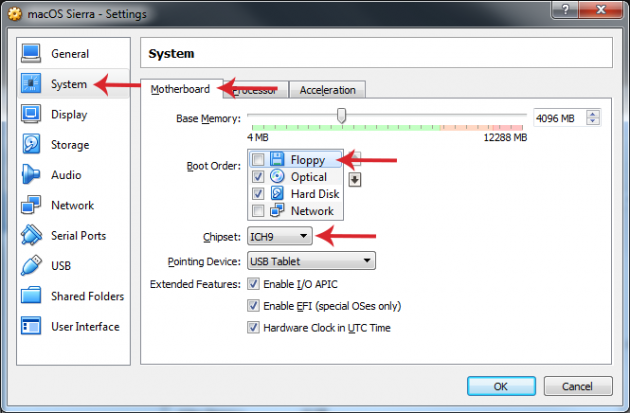
From System menu and under the Motherboard tab uncheck the Floppy option from the Boot Order field, and then select ICH9 next to the Chipset field (if it’s not already selected).
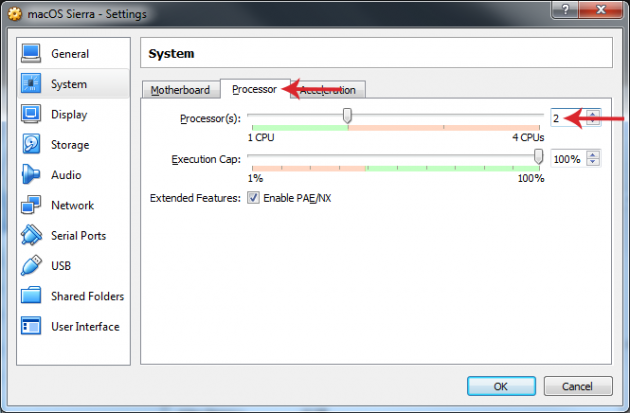
Under the Processor tab select at least two CPUs.
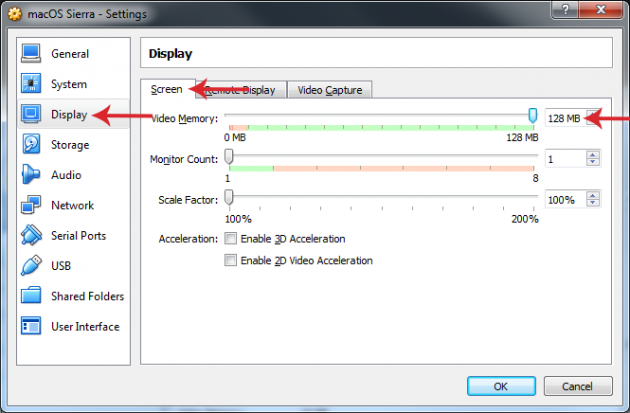
Then move on to the Display menu from the left side of the window, and under the Screen tab set the Video memory to 128MB, which is the maximum value.
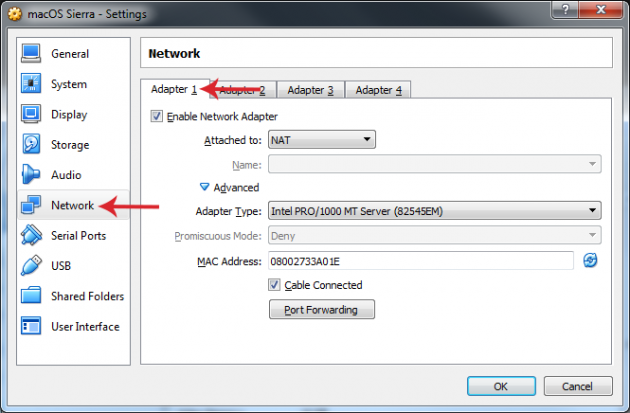
Next navigate to the Network menu and set the Attached to setting to NAT, and the Adapter Type to Intel PRO/1000 MT Server (82545EM).
Lastly, navigate to the General tab and note down the exact name that you gave to your machine because you will need it in the next step.
When you’re done, close VirtualBox.
Adding code
At this point you’ll have to use the command line to add some code to VirtualBox.
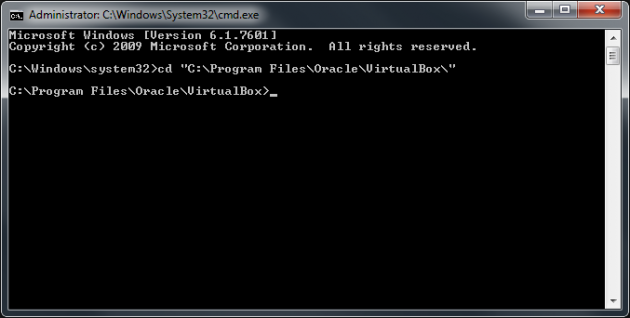
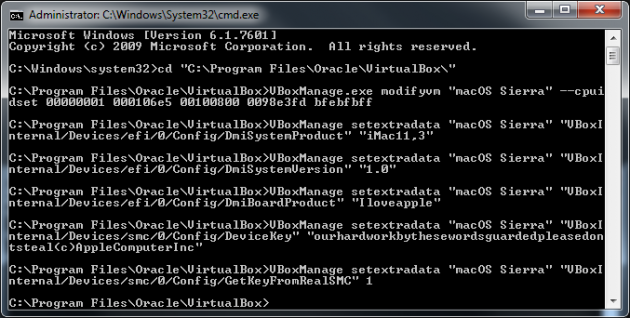
First, open an elevated command prompt, paste the following command and hit Enter (change the letter C accordingly if you installed VirtualBox in another partition):
cd "C:\Program Files\Oracle\VirtualBox\"
Then, copy-paste the following set of commands one by one, hitting Enter each time before moving on to the next (note that in this example we used “macOS Sierra” as the VM name, change it accordingly if you used another name for your VM):
VBoxManage.exe modifyvm "macOS Sierra" --cpuidset 00000001 000106e5 00100800 0098e3fd bfebfbff
VBoxManage setextradata "macOS Sierra" "VBoxInternal/Devices/efi/0/Config/DmiSystemProduct" "iMac11,3"
VBoxManage setextradata "macOS Sierra" "VBoxInternal/Devices/efi/0/Config/DmiSystemVersion" "1.0"
VBoxManage setextradata "macOS Sierra" "VBoxInternal/Devices/efi/0/Config/DmiBoardProduct" "Iloveapple"
VBoxManage setextradata "macOS Sierra" "VBoxInternal/Devices/smc/0/Config/DeviceKey" "ourhardworkbythesewordsguardedpleasedontsteal(c)AppleComputerInc"
VBoxManage setextradata "macOS Sierra" "VBoxInternal/Devices/smc/0/Config/GetKeyFromRealSMC" 1
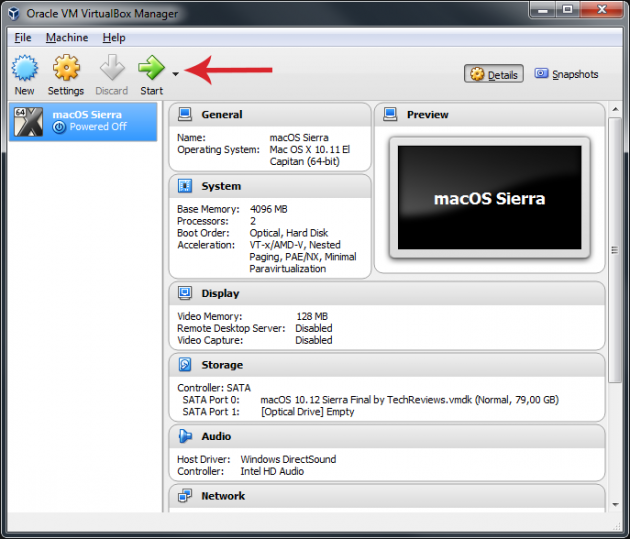
After executing all the commands, close the command line window, open VirtualBox, and boot the Mac OS X virtual machine.
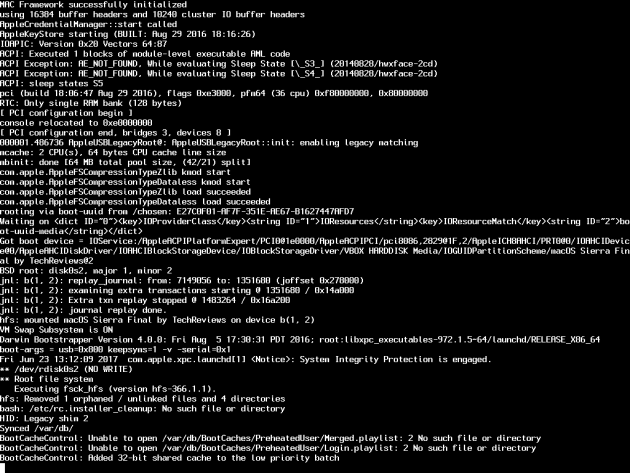
If you followed the process properly, the VM will boot. At first you will see just some lines of code, and it may take some time before the VM is booted, so don't worry if you don't see anything for a while.
After this phase, the installation of macOS Sierra will begin, for which you can follow the steps outlined below.
First boot of macOS Sierra
Now that you have prepared your virtual machine, you can proceed with the first boot.
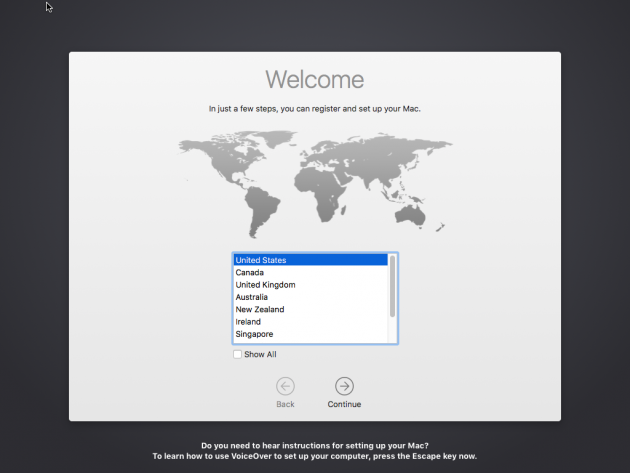
The first thing you will be asked to enter is your location. So, select your country from the list, then click on Continue.
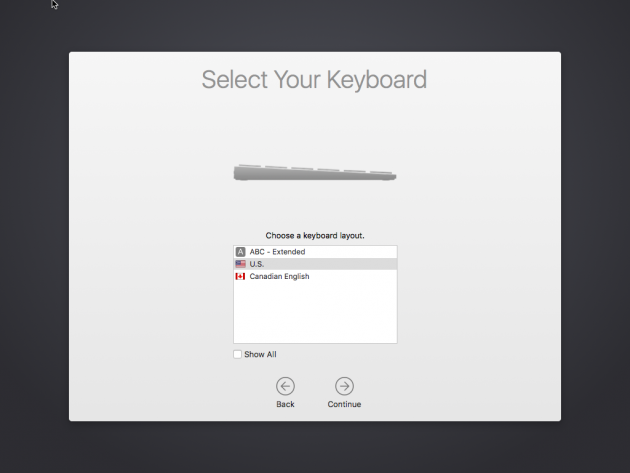
The next step is for configuring your keyboard layout, but it’s recommended that you leave it as is, if you don’t have any particular reason to make any changes. Click Continue to proceed to the next screen.
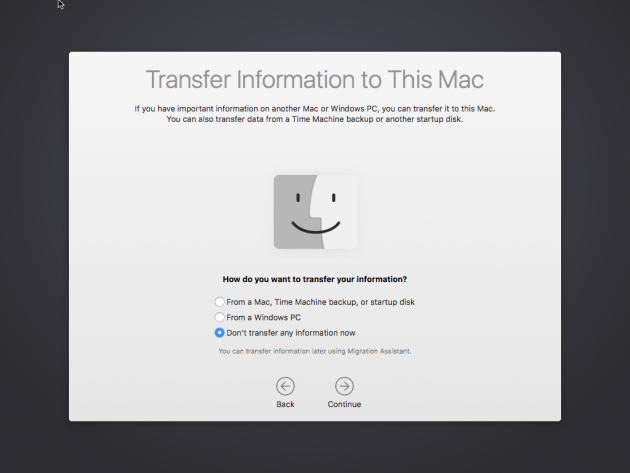
At this point you will be asked to transfer your information from another device to this one, but select Don’t transfer any information now to skip that, and click Continue.
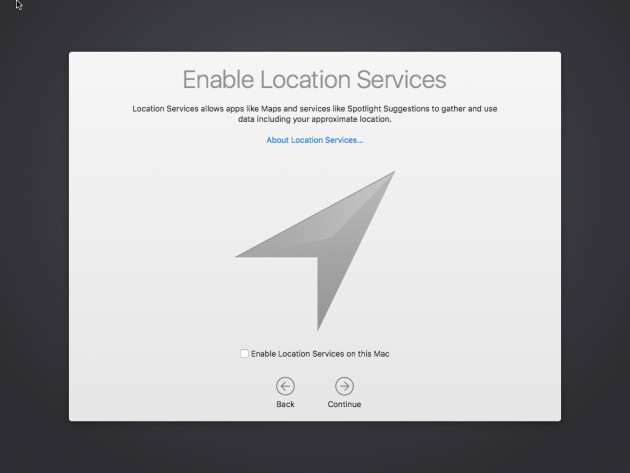
The next screen will ask you to enable location services. Leave this option unchecked, and click Continue again.
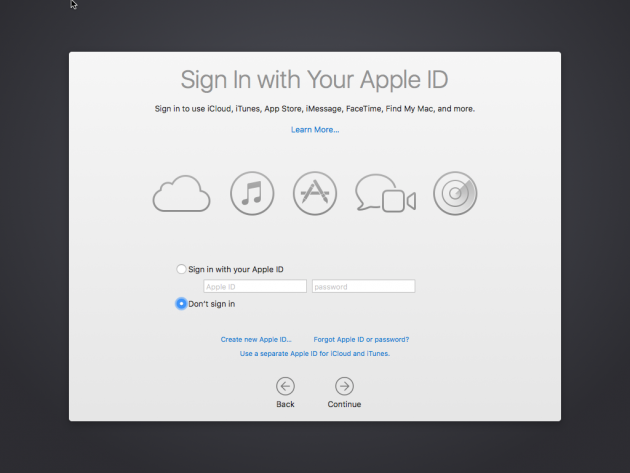
Then you will be asked to sign in with your existing Apple ID if you wish, create a new Apple ID, or simply create a local account for use with the VM instead. You can choose any option that you want.
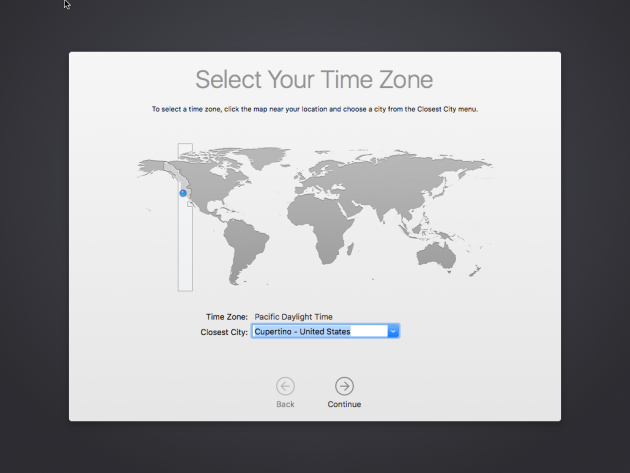
Afterwards you have to select your time zone.
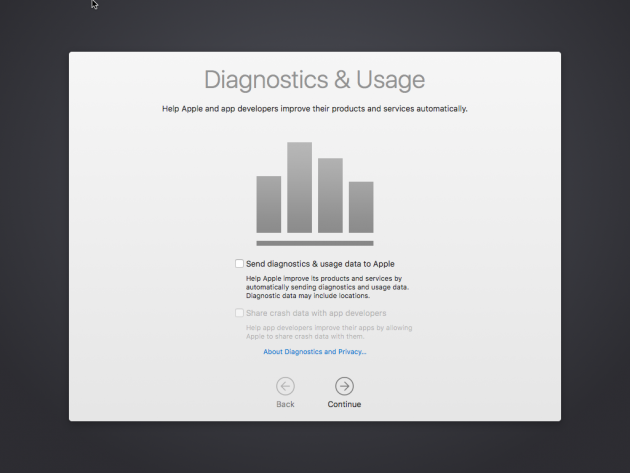
Then you'll be asked to choose whether you prefer to send diagnostics and data back to Apple. It’s recommended that you keep this option disabled for privacy reasons.
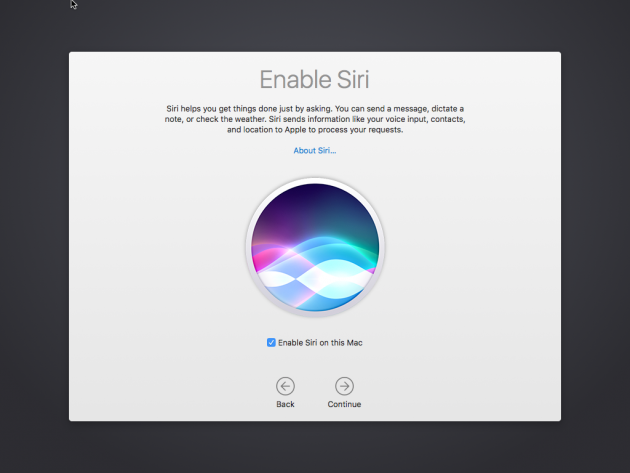
The next step asks you whether you wish to have Siri enabled. It’s ok if you keep her on, she’s good company at times.
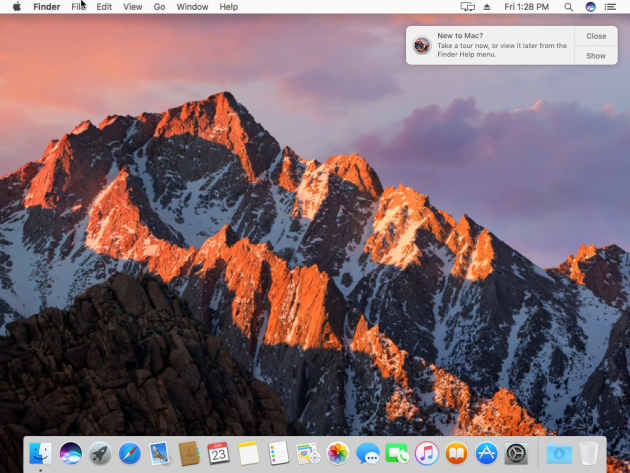
That’s it! Your macOS Sierra installation is ready. Now, the Mac OS X virtual machine that you created is available for you to use any time you wish.
If you have any suggestions or thoughts, let us know by posting in the comments section below!

