How to create a shortcut for each Hyper-V Virtual Machine in Windows 10 (or 8)
Normally in order to start a Hyper-V virtual machine you would have to launch it from the Hyper-V Manager application, which is certainly easy enough. However, an even faster and more convenient way to launch a Hyper-V virtual machine is to simply create a shortcut that you can pin to your desktop, task bar, start menu, or any other easily accessible spot. In the following guide, we'll show you how to create an elevated shortcut that will run your Hyper-V virtual machine in administrative mode with a simple double-click:
Note: This guide works for machines running Windows 8 and Windows 10.
1 - Creating the Shortcut
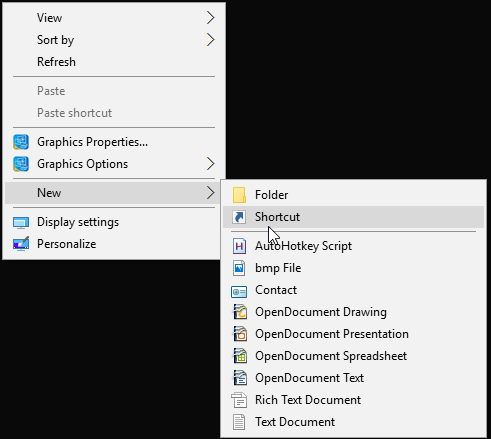
1.a) Right-click an empty spot on the desktop and select New>Shortcut from the context menu:
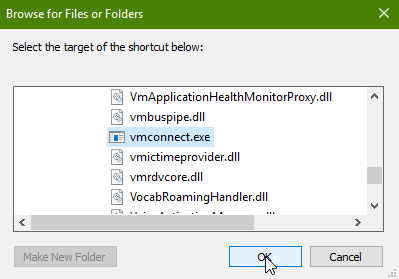
1.b) Click Browse... then navigate to and select the Virtual Machine Connection executable (vmconnect.exe) in the folder: C:\Windows\System32\ then clickOK:
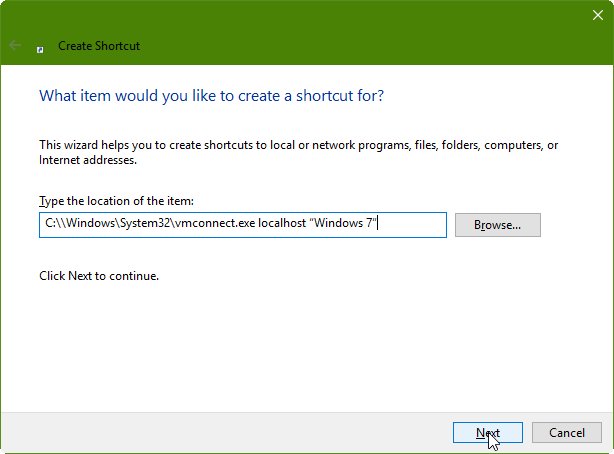
1.c) Next you'll have to choose the location of the shortcut. To do that, you'll enter the following folder path:
C:\\Windows\System32\vmconnect.exe localhost “name of virtual machine”
So for example, in the screenshot below the path I've entered points to a virtual machine I named “Windows 7”. To proceed click Next.
1.d) Finally, give the shortcut a name and clickFinish.
2 – Giving the Shortcut Administrative Privileges
In order for your newly created shortcut to work it has to have administrative privileges. Technically, you could just right-click the icon and select “Run As Administrator” every time you open it, but if you want to eliminate that step you can set the shortcut to automatically administratively by taking the steps below.
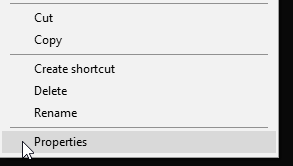
2.a) Once the shortcut has been created, you should see it on your desktop. Right-click on the shortcut icon and select Properties.
2.b) Click on the Shortcut tab, then click Advanced:

2.c) Ensure the “Run As Administrator” option is checked then click OK.
The above process will set the shortcut to run every time you double-click it without any extra steps involved. However, now every time you try to open the shortcut you will encounter a prompt that will ask you whether you want to grant the app Administrative Access. If you want to bypass that and launch the virtual machine without any prompts then you'll have to take the extra step of elevating the shortcut to launch without UAC prompt.
3 - Launch the VM
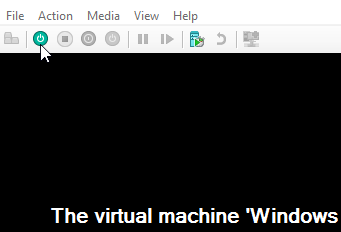
Finally, let's test the shortcut by double-clicking on it. Once the Virtual Machine Connection program opens you can turn the virtual machine on by clicking the Start/Power button in the top left corner of the window:
There you have it. With the steps above you should now have a fully functional Hyper-V virtual machine shortcut that you can launch at startup or with a double-click. You can also pin it to the task bar, drop it in a Quick Launch menu, place it in the start menu.
Further reading: How to Make Hyper-V Virtual Machines Launch Automatically at Startup.

