How to Benchmark your DNS for Faster Internet Speeds in Windows, Mac, and Linux
One commonly overlooked setting that has a major effect on your internet browsing speed is the Domain Name Server (DNS) that your computer is communicating with. In simple terms, these servers are how the internet transfers data around the globe. However, some DNS servers may be outdated, inefficient, or located too far from you to operate optimally. Although your ISP typically uses one of their own DNS servers, if you're able to find a better one (See our list of Top 10 Public DNS Servers.), you have the option of manually changing your DNS to significantly speed up your web browsing experience.
This is where “DNS optimization” comes into play. By finding and connecting to the best DNS server in your region you can literally double web browsing speeds in some cases. There are several ways to test the response time of available DNS servers, but the fastest and easiest way is to use a DNS benchmarking application. These useful tools compare the response time of your current DNS with other publicly available DNS servers to find the one that would facilitate the best possible performance.
In some cases, simply flushing/resetting your DNS cache can help your operating system communicate more efficiently with your current DNS. With that said, here's a quick guide showing you how to use the two most popular DNS benchmark apps, Namebench and DNS Benchmark, to find the fastest DNS in your area and increase your internet speeds.
(Note: The instructions below are illustrated in Windows 10, but the process will be similar in Mac and Linux because the GUI's are the same on all platforms.)
How to Use Namebench to Find the Best DNS
Namebench a fully free utility that analyzes your TCP dump output, browser history, and standardized datasets to generate an optimal DNS recommendation. It's available for Windows, Mac, and UNIX. Once you've downloaded the appropriate installer from one of the links in the previous sentence, follow these steps:
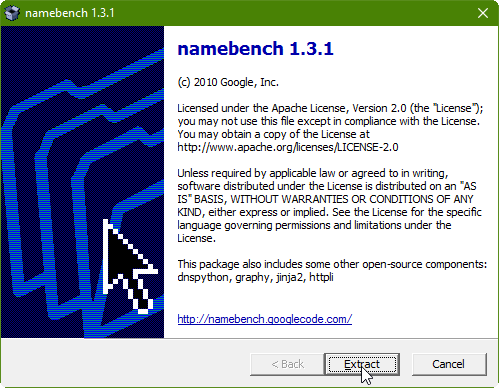
1. Run the installer executable you just downloaded and then click Extract:
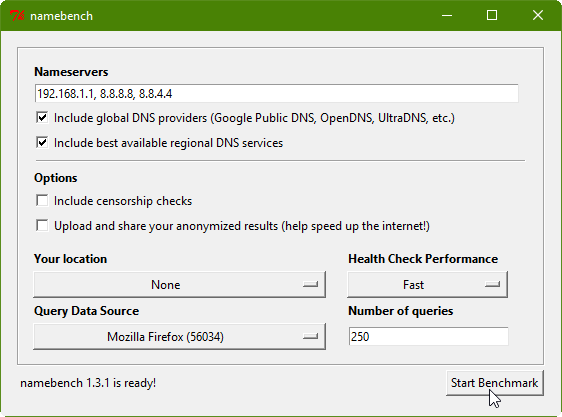
2. The Namebench interface will appear after the extraction is complete. You'll see the address of your current DNS along with a few other options. Make sure “Include best available regional DNS services” and “Include global DNS providers” are both checked, then click Start Benchmark:
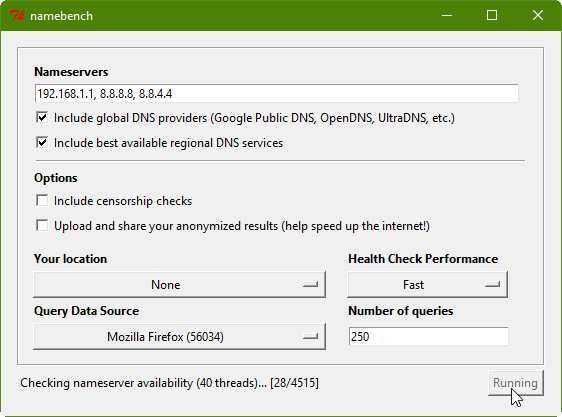
3. The benchmark test will begin and you'll see the status in the bottom left corner of the window. The test usually takes about 5-10 minutes to complete.
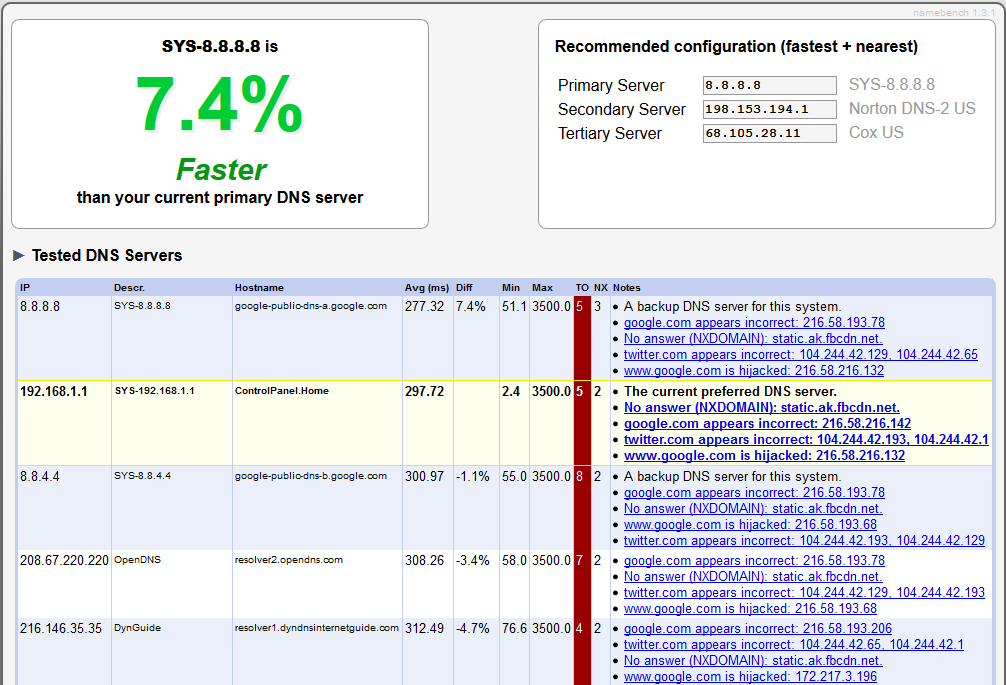
4. The scan results will appear as an HTML page displayed in your default browser, showing a list of the DNS servers that were tested as well as the fastest found servers and the recommended configuration for the fastest and nearest primary, secondary, and tertiary DNS in the top right corner:
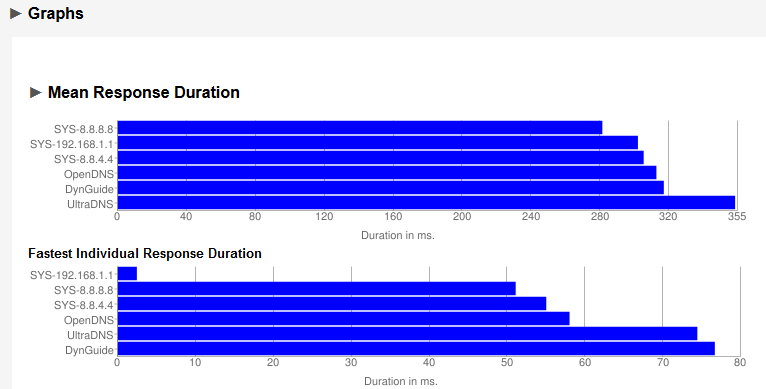
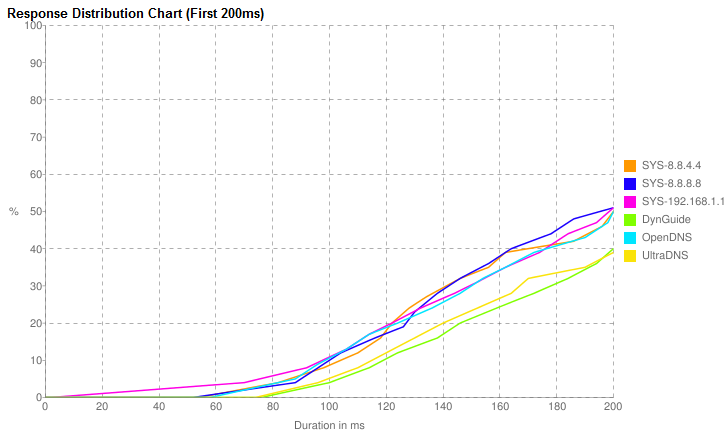
You also have the option of viewing additional informative graphs to more accurately compare mean response times and individual response duration:
You can also export the scan results to a .CSV file for later viewing:
To switch to the new DNS configuration recommended in the benchmark results, see the final section at the bottom of this guide.
How to Use DNS Benchmark to Find the Best DNS
DNS Benchmark is a more advanced tool developed by Gibson Research Company (GRC), the maker of popular freeware like LeakTest, Wizmo, and ClicKey. Follow these instructions to use DNS Benchmark for finding the best DNS server:
1. Visit the DNS Benchmark download page, scroll down and download DNSBench.exe (download by clicking Download Now, or by clicking the image above or the self-explanatory link below it):
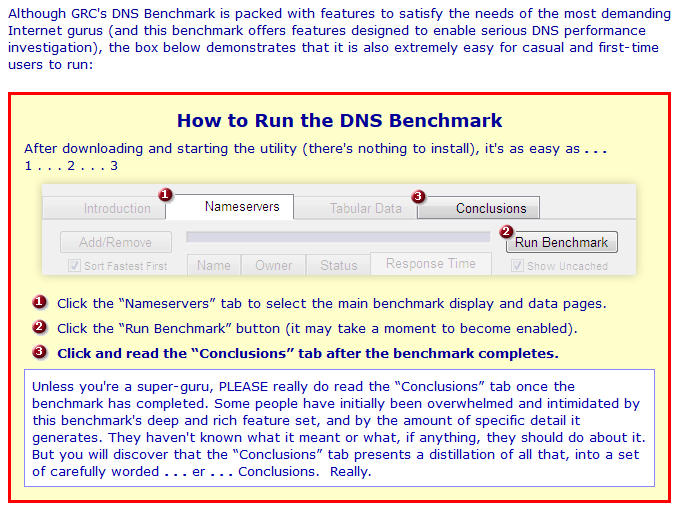
2. GRC provides a simple three-step guide for using the basic benchmarking feature of the program:
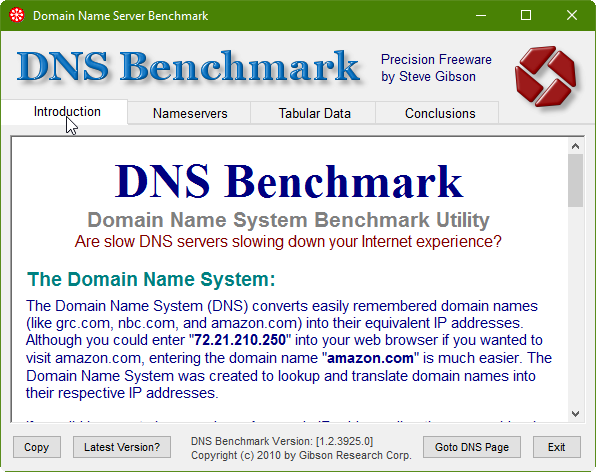
3. Although it's not completely necessary, if you want to learn more about using the tool to its full potential, be sure to spend some time reading through the Introduction tab first:
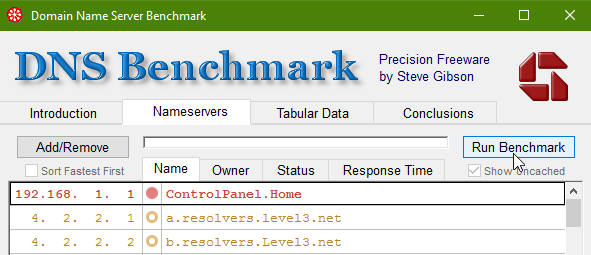
4. As mentioned in the informative screenshot in step 2, to run a benchmark test, click on the Nameservers tab and then click the Run Benchmark button:
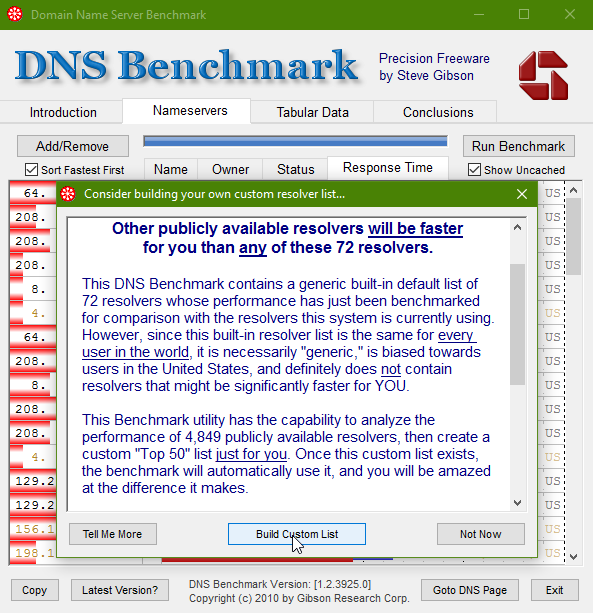
5. Once the test is finished, you'll see a list of servers sorted with the fastest at the top. However, by default DNS Benchmark only compares your current DNS to a limited list of about 70 other DNS server's which is a tiny fraction of the more than 4,000 that you could be comparing. As such, once the test is done, you'll be shown a prompt urging you to try creating your own custom server list for better results:
Since DNS Benchmark has an extensive number of advanced features and capabilities, GRC has created a detailed operation manual that can help you get the most out of it.
Namebench vs DNS Benchmark
So which one does the job better? While that's ultimately a matter of preference, Namebench does offer the advantage of coming pre-loaded with a list of more than 4,500 servers to compare.
However, DNS Benchmark offers more advanced options and features, and some users would argue that testing thousands of DNS servers isn't necessary because there will usually only be a handful that are worth comparing. Plus, Namebench takes a lot longer to complete a benchmarking comparison for this reason.
Still, if you're a novice user and you don't want to take the time to build a custom list in DNS Benchmark, then you might take the trade-off of having to wait for the longer test time in Namebench in exchange for the perk of not having to do any extra technical work.
Thus, in terms of simplicity and usability for finding the best DNS server, Namebench seems to be the easiest novice-friendly option. On the other hand, DNS Benchmark is perfect for advanced users who would rather compare custom server lists to save time while scanning.
A dual approach is best – Use Namebench to find a list of the best DNS servers near you, and then use that information to create a custom list in DNS Benchmark for a more detailed/refined comparison of the servers recommended by Namebench.
How to Start Using the Recommended DNS Configuration
Now that you've used one or both of the two tools above to find the best DNS servers for your situation, you can start using the newly found optimal server by following our guides on changing your DNS settings in your operating system:
You also have the option of changing your router's DNS settings, so that every machine connected to the router will automatically be assigned the new DNS. However, the instructions for changing your router's DNS settings will vary depending on the router, so if you'd like to go that route you should run a web search for “how to change DNS settings on (router name and model)” for exact guidance on how to perform the process on your specific router.

