How To Add Multiple Operating Systems On A Single USB Flash Disk
The era where the only operating system in your computer was Windows is long gone. Nowadays, a user can use multiple operating systems on the same computer, and instead of having a DVD or USB drive for booting each one, it is now possible to have all of them in a single USB drive.
Creating multiboot USB disk with WinSetupFromUSB
WinSetupFromUSB is a free program with the help of which you can create a bootable USB disk for installing any version of Windows, Linux, and tools like Acronis or Paragon.
In previous articles we saw how to create a bootable USB disk, but only for a single operating system. However, WinSetupFromUSB does not have such restrictions. In a single USB (which is of sufficient capacity) you can include:
- Multiple Windows operating systems, such as XP, 2000, 2003, Vista, Windows 7, Server 2008, Windows 8, Server 2012, Windows 10 (32 and 64-bit versions supported). It is also possible for the USB to load either on BIOS or UEFI.
- Bootable recovery tools, such as Ultimate Boot CD for Windows, which contain repair, recovery and diagnosis tools for various computer problems.
- Multiple Linux distributions and Linux-based tools in ISO format, such as Debian, Ubuntu, Fedora, or CentOS.
- Ability to create a Syslinux bootsector using a Linux ISO file.
Here is a non-exhaustive list of the sources that you can be added to the USB disk with WinSetupFromUSB, with download links where possible.
Downloading the latest version of WinSetupFromUSB
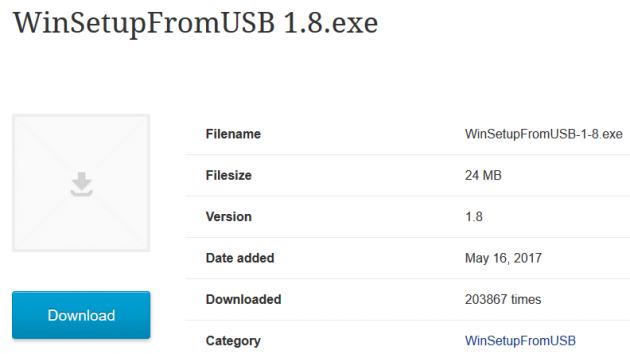
You can download the latest version of WinSetupFromUSB from its official website. From there you can view the application’s changelog for its latest version, which contains information such as support for new Windows versions, bug fixes etc.
So, select the newest version available and download it.
Then double-click on the downloaded file to run it. A 7-Zip self-extracting dialog window will be displayed, which will ask you to extract the included contents, so select the destination directory and click on Extract.
Apart from the extraction process, no further installation is required, since the application is portable.
Downloading the ISO of your choice
To create a bootable USB with multiple operating systems, you need to have their respective ISO files. The same applies to any other tools that you want to add.
ISO files are image files. In fact, they are folders, the contents of which are displayed when burned to a CD/DVD, bootable USB, or alternatively, mounted on virtual CD/DVD devices, either through the built-in mount functionality in Windows 8 and Windows 10, or with special applications such as Daemon Tools.
If you wish to install multiple Windows operating systems, you can download the corresponding ISO files from Microsoft’s website as seen in a previous guide. Similarly, you can find ISO files for Linux distributions such as Linux Mint and Ubuntu in their respective websites.
Obviously, in order to add multiple operating systems in a USB disk, it needs have the necessary space as well. You need to have about 4GB for each OS, so make sure that they can all fit in your flash disk.
Running WinSetupFromUSB
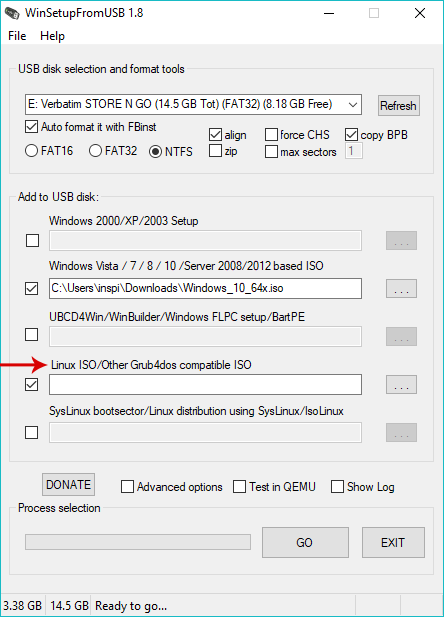
WinSetupFromUSB is portable, which means that you do not have to install it in order to run it, so double-click on the executable that corresponds to your system's architecture (32 or 64-bit) to open it. If you have already connected the USB flash drive in your computer, WinSetupFromUSB will detect it automatically.
So, enable the Auto format it with FBinst option first, and then choose NTFS or FAT32. Their difference is related to the computer that will load the operating system- if it uses BIOS, then select the NTFS option, otherwise (on the UEFI case) select the FAT32 option. Usually, the NTFS filesystem is preferred.
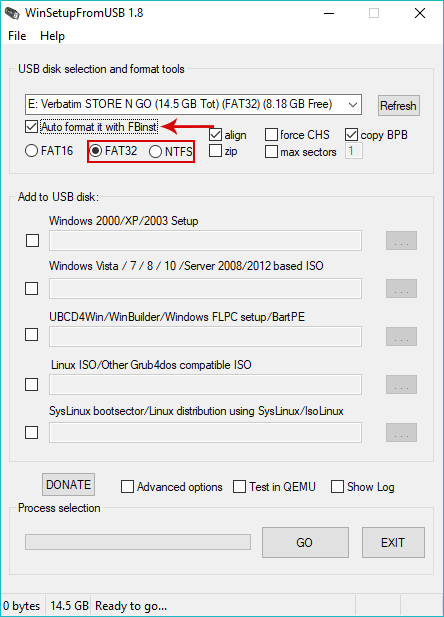
The next step is to choose one of the multiple operating systems that you wish to include. For example, if you wish to add Windows 10, check the corresponding field and then browse for the ISO file.

After selecting the ISO file, you might be notified that if you need UEFI/BIOS support, you will need to use the FAT32/NTFS filesystem respectively. Press OK to continue.

Adding multiple operating systems in the USB disk
Now, you can either finish creating the bootable USB with a single operating system, or you can add more operating systems. The only difference is that, at this point, you can only add a Linux or another compatible ISO file, since more Windows operating systems can be added only after the operating system that you have already selected is installed.
So, select the ISO file of your choice from the corresponding field and open it.
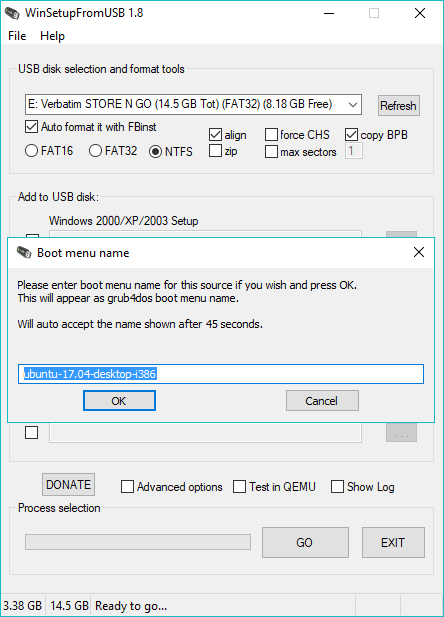
Then you will be asked to enter a boot menu name for this OS, so type something if you wish, and click OK.
Now you are ready to complete the process of adding multiple operating systems in your USB flash disk. Check the Test in QEMU and then click on GO.
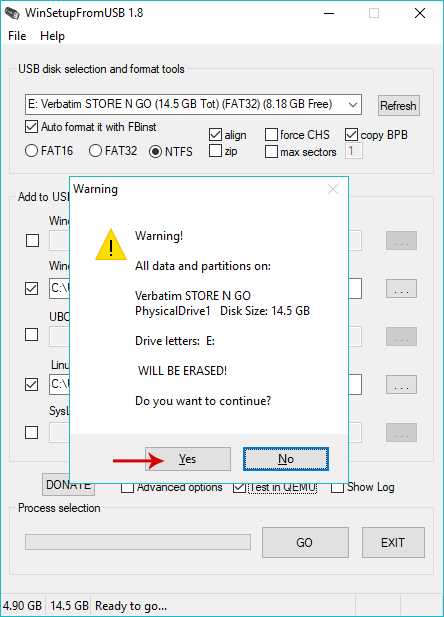
A message will be displayed which warns you that all data on the USB drive will be erased. Click YES, and then click YES again.
This is a process that takes a lot of time, depending on the size and the speed of the disk.
After a while, WinSetupFromUSB will load a QEMU emulation environment, from where you can choose one of the multiple operating systems that you added.
You can see if the ISO files that you added to the USB are loaded correctly, so when you’re done just close the window. WinSetupFromUSB will display a message stating that everything went well.
Adding multiple Windows operating systems in the USB drive
At this point you can also add other versions of Windows using the same process- you just have to add one Windows OS at a time.
First, after performing the process once, make sure that the Auto format it with FBinst option is disabled (since it will format the USB drive again, if enabled).
Then, you’ll have to browse for the Windows OS that you want to add, check the Test in QEMU option and click on GO. Repeat the above procedure for the Windows operating systems that you want to add, as long as the necessary space is available on the USB drive.
That’s all! Now you have all the operating systems that you want in a single USB flash disk. If you have any questions, thoughts or problems, let us know by posting in the comments section below!


