How to Switch Microsoft Account to Local Account in Windows 8/8.1
Although having your Windows 8 account linked with your Microsoft account has it's benefits (and is required for certain functions on Windows 8), it can be a nuisance at times, and some people just don't want them linked. Fortunately, it's very easy to un-link your accounts, and convert your Windows 8 account into a local user. This tutorial will show you how to do it in the quickest, and easiest way possible.
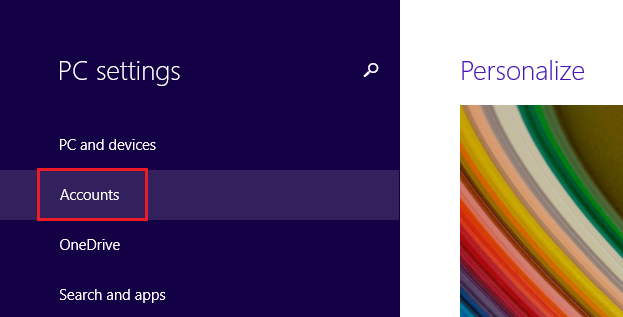
1. Open up your PC Settings. To do this, move your mouse to the bottom-right corner of your screen, and then click on "Change PC Settings".
2. Look at the menu on the left side of the screen, click on the tab that says "Accounts". Note: if you are using Windows 8, this tab will actually be called Users. It is only called Accounts in Windows 8.1.
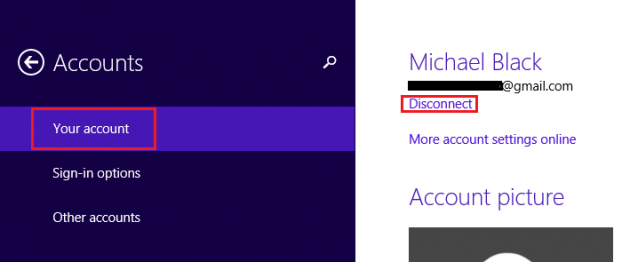
3. By default, it will select the "Your Account" tab. On the right side of the screen, find the option that says "Disconnect" and click on it. Note: in Windows 8, this will still be under Your Account, but the option says "Switch to a local account", instead of Disconnect.
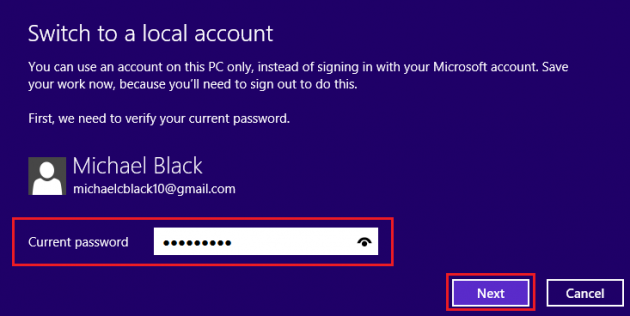
4. Next, you'll need to enter the current password of your Windows 8 account that is associated with your Microsoft account. Just type in the password you always use and click Next.
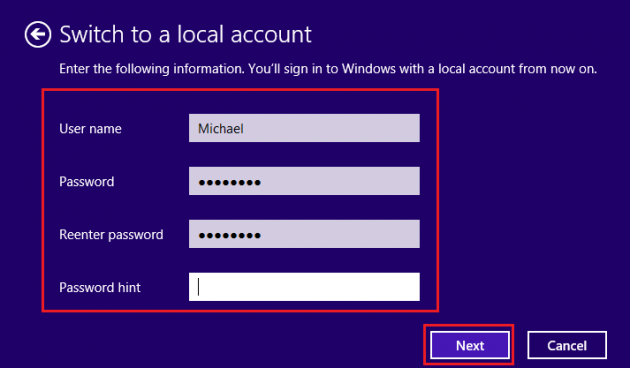
5. Now you can change your user name if you wish, it will default to the name on your account. You can also enter a new password, as well as a password hint. Once finished, click next.
6. Just click "Sign out and Finish" on the next page, and allow it to process for a few seconds. When finished, you'll be signed out and brought to the windows log-in screen with the new local account available. Go ahead and sign in, and you'll be using an un-associated account.
Thanks for reading this tutorial, and be sure to let us know if you have any questions or issues in the comments section below.


