How to Manually Install Drivers in Windows 10
Many times installing different device drivers will solve a number of connectivity or compatibility issues. For example, we recently explained how to turn your Windows 10 PC into a Wi-Fi router/hotspot, and the very first step in doing that is to downgrade to older drivers for your Wi-Fi adapter. Here's a short and simple guide you can use to manually install drivers for your wireless adapter or any other device:
Step 1. Find and download the drivers. This step will vary depending on the device you need drivers for, but generally you can find drivers for any device by searching for "(device name here) drivers." For example, to find drivers for my Realtek RTL8723BE Wi-Fi adapter I would search for "Realtek RTL8723BE drivers" in Google or another search engine. Be sure to remember the location you download to, as you'll need to browse back to it when installing the drivers. Also, only download drivers from reliable sources (preferably the support section of the manufacturer's website).
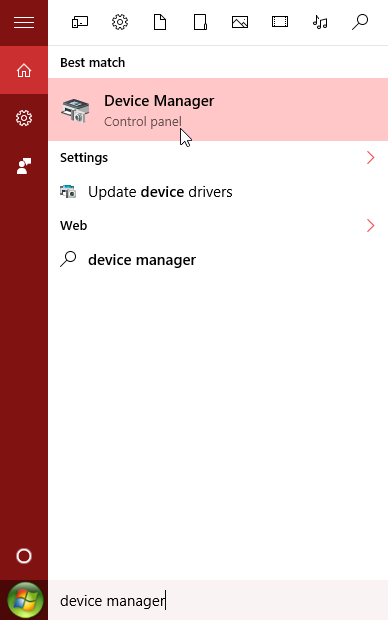
Step 2. Now that you have downloaded your drivers, click on the Windows search bar, type "device manager" and click on the "Device Manager Control panel" result to open the Device Manager:
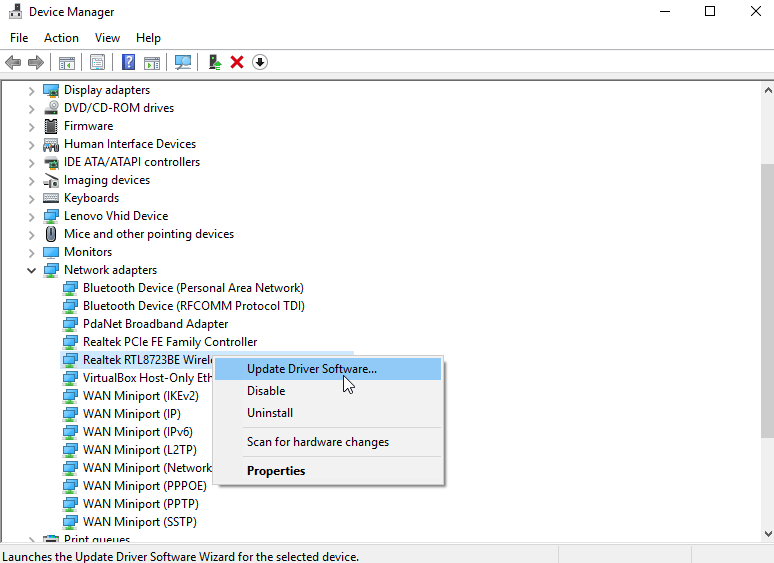
Step 3. Right-click on the name of the device you want to install drivers from, and then click 'Update driver software...'
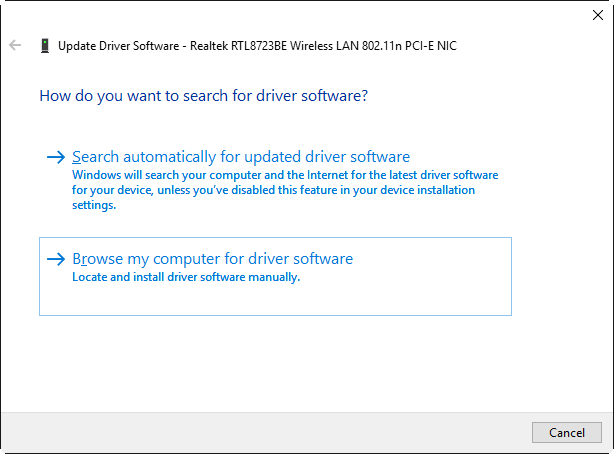
Step 4. Select 'Browse my computer for driver software'
Step 5. Select the folder you downloaded the driver to, and then click 'Next'. Follow the prompts to complete the driver installation. Be sure to restart your computer after the installation completes.
The simple steps above should put you on the right path to installing device drivers manually in Windows 10. If you run into any problems, feel free to leave your questions in the comment section below.


