How To Create And Embed Your Own Signature In Your Emails
When sending a business email, you want to make sure that your signature is an indication of your reliability and seriousness. A properly structured signature in an email will attract attention and leave positive impressions on the recipient. In this article we will go through the best ways for adding a personal or professional signature in your emails.
- How important is a signature in emails?
- What should a signature include?
- Free tools for creating a signature
- How to have your signature included in your emails automatically
How important is a signature in emails?
If you send a personal email to someone close to you, it’s obvious that the signature is not very significant. However, a large portion of sent emails are not directed to close ones, but rather strangers, colleagues, professors, and other kinds of people, communication with which requires a more formal framework. In this case, a signature is a strong feature which can prove to be very useful, since it can convey many messages for yourself or a company that you represent. It can make a difference, giving a positive or negative impression on the recipient.
What should a signature include?
Your email signature should contain some basic elements, the most important of which is (obviously) your name. It’s equally important to mention your profession, along with the company you work with.
Additionally, you should also include ways in which one can communicate with you (apart from email). It could be your phone, email address, professional profile on social media, etc.
In summary, your signature can include the following information:
- Full name
- Profession
- Company name
- Web page
- email address
- Phone
- Professional profiles in social networks
- Profile photo
Of course, you must be careful not to overdo it with the amount of information provided. The size of an email signature should not exceed three or four lines.
Free tools for creating a signature
Now that you’ve chosen what to include in your signature, the next step is to add it in your emails. All modern webmail services and email management programs have settings for automatically including a signature in your emails.
So, all you need to do is create a signature. Fortunately, there are several free tools on the internet for this purpose that automate this process. One of them is Newoldstamp, which has several options in its free version.
Newoldstamp
Neowldstamp is one of the most popular services for creating signatures. It is free, but has paid plans as well. The free version has some limitations of course, but it’s enough for the basic needs of the average user.
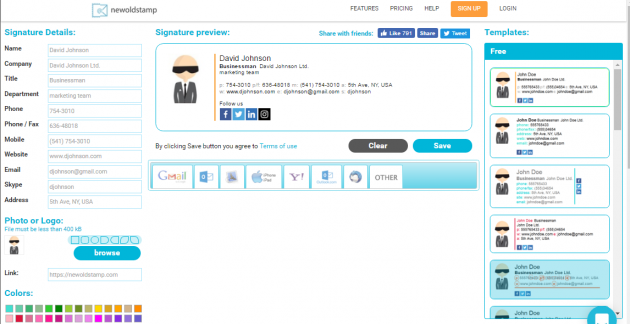
To begin, click on the Create Free Signature button located at the top right corner of the homepage. Then you will be directed to the app’s editor, where you can begin creating your signature.
You can start by choosing a template from the right side of the window. As you can see, there are only four free options. The rest are available only for premium users.
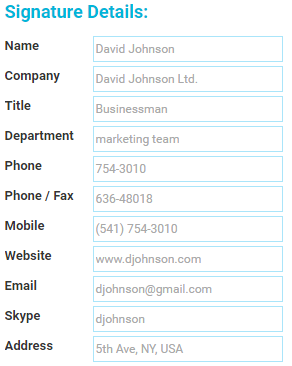
Then you can proceed by completing the fields of the column on the left side. Note that it is not necessary to fill all of them.
Right below this column you may pick a photo to include in your signature, as well as a color of your choice. Unfortunately, changing the shape of your photo is a premium feature.
Social media profiles can be added from the right side of the editor.
When you’re done making changes, you may see how your signature will look in the preview window, and if you’re satisfied, click on the Save button to save it.
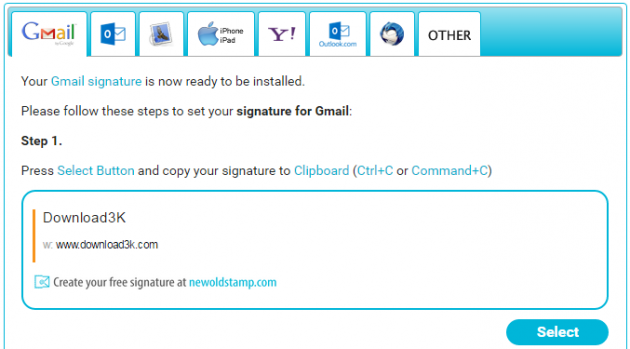
At the bottom you can see a list of all available email platforms, so select the one that you use, click on Select and press Control + C to copy the signature.
Before moving to the next section for describing how you can embed your signature in your emails, let’s go through a couple of alternative services for creating a signature.
Alternative tools for creating an email signature
Apart from Newoldstamp, there are various other free alternatives, but we’ll not go in detail regarding their features, since they are pretty much similar.
Hubspot
Hubspot is another web app for creating signatures.
Even though it doesn’t have as many formatting options as Newoldstamp in its free version, it allows you to include all the necessary information.
Furthermore, although it doesn’t ask you to choose the email service you use, it gives you the ability to copy the final signature either in text format, or use its source code. This way it can cover all email services and apps.
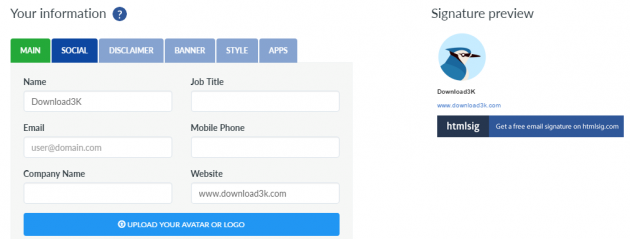
Htmlsig
Htmlsig doesn’t have as many features in its free version as the aforementioned services, but is still worth using.
How to have your signature included in your emails automatically
Once you have created the appropriate signature, you must embed it in your email client or webmail service that you want it to be included at the end of each message.
Here is how you can achieve this in the most popular apps and webmail services.
Gmail
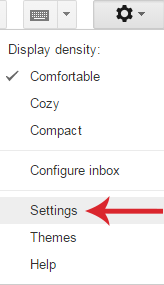
For Gmail, this option is located within the Settings menu.
From there, and under the General tab, locate the Signature pane, and simply paste the signature that you created, into that pane’s editor.
Then click on Save changes once you’re done.
Outlook Live
Outlook Live users will first have to get to the Options menu.
Then, navigate to the Mail -> Layout -> Email signature subcategory.
There, you can paste your signature and make a few optional settings as well, as to when the signature should be added.
Yahoo
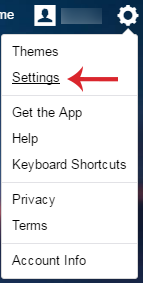
For Yahoo, the process is similar. First, navigate to the Settings menu.
And then go to the Accounts category. From there, select your account.
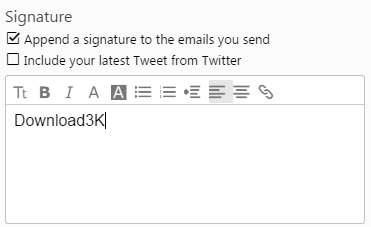
Under the signature section, enable the Append a signature to the emails you send option, and paste your signature in the box below.
After making changes, click on Save.
Thunderbird
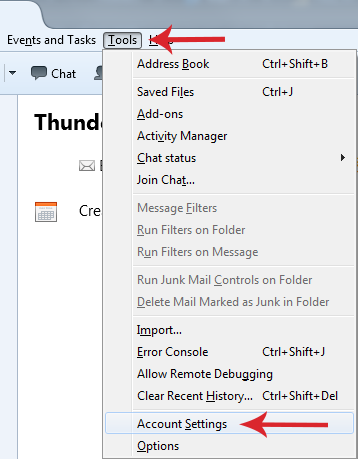
To add a new signature in Thunderbird, go to Tools and open the Account Settings menu.
In the Signature text, insert your signature.
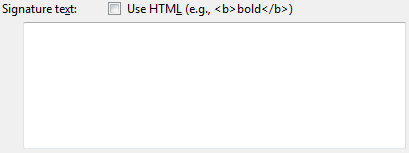
In contrast to webmail services, in order to add graphics and photos in your signature, you must do so by pasting HTML code in the text editor, and only after enabling the Enable HTML option (located above the editor) first.
Outlook
If you’re using the Outlook client instead of its webmail version, then go to File -> Options, and from the Email category, click on the Signatures button. In the window that opens, click on Create and give a name to your signature, click OK, paste your signature into the editor and you're done!
Creating a signature and including it in your emails is quite easy, as you can see. If you have any problems or suggestions, let us know in the comments section below!


