How To Create A Complete Windows Backup Image
Ok, so you’ve reinstalled Windows, installed all your preferred programs and everything is ready for a fresh Windows experience. At this point, you can create a full Windows backup image, which will allow you to store your whole Windows installation in a single file. This way you can restore Windows, installed programs and your files if something happens, quite easily.
There are several applications that can create a Windows backup image. Even Windows itself has a built-in tool for this purpose, but it does not have many features.
For this guide we picked AOMEI Backupper because it is a free tool that is easy to use and has a lot more features than the built-in Windows backup tool.
- Downloading and installing AOMEI Backupper
- How to perform a complete Windows backup
- Creating bootable media
- Restoring Windows backup from the bootable media
- Does AOMEI Backupper support creating backups for other operating systems?
Downloading and installing AOMEI Backupper
In order to download AOMEI Backupper, simply visit its website (or use our mirrors here), click on the Local Download button, and then either on Local Download 1 or Local Download 2. It’s recommended that you use the Local Download option and not the CNET option, since CNET often makes you download and install download managers that, in-turn, try to install third-party applications in your computer.
If you’re using Windows 7, 8.1, or 10, you can download a different installer that is relatively smaller but does not support XP or Vista at all.
Once the download is complete, run the installation package and follow the on-screen instructions to proceed with the installation procedure, which is pretty straightforward actually and does not try to install any 3rd-party applications.
How to perform a complete Windows backup
AOMEI was designed with simplicity in mind, which means that you won’t have to deal with advanced settings and configurations.

To begin creating a complete Windows backup image, all you have to do is open the program and select System Backup located in the Backup menu on the sidebar.

Next, give a name to your Windows backup, select the location you desire to store the image file and then click on Backup Options.
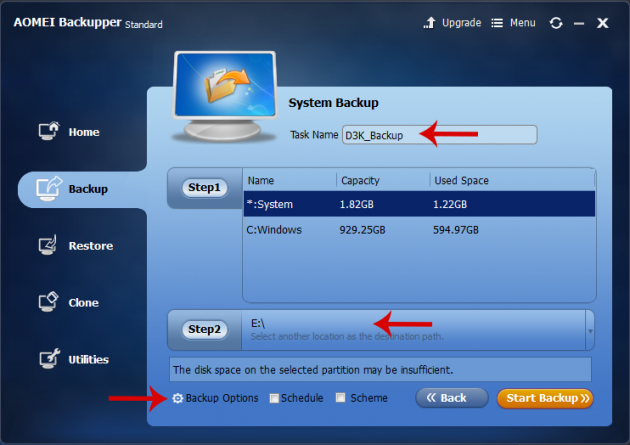
Note that you need to save the image file to a separate disk. If your disk is split into two or more partitions, it makes no sense to store your Windows backup to a partition of the same disk, because if the disk becomes damaged then no partition will be accessible, and consequently your backup will be lost.
Backup options
In the Backup Options screen, under the General tab you can (optionally) add information about this backup in the Comments field. You can be as brief or thorough as you wish in this step.
From the Compression tab you can select the compression level for your image file.
High compression requires more processing power, and will slow down the process of creating the image file. Normal or None will give you a larger image file, but the process will not take as much time. In this case, the Normal setting, is recommended, but if you have plenty of time available to leave the computer running, you could select High instead.
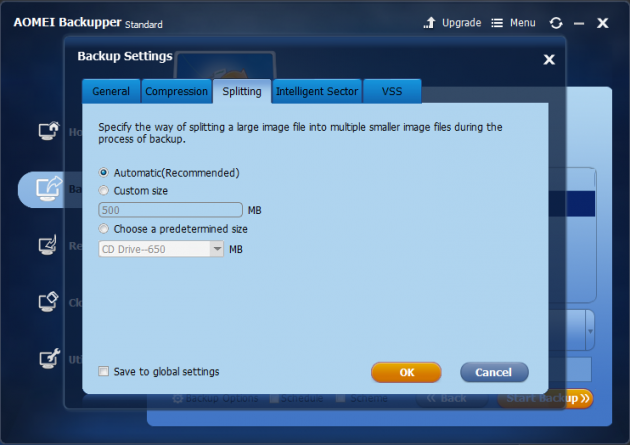
The settings under the Splitting tab give you the ability to automatically split the backup file into smaller pieces, if you think that having one large file for it is not practical.
From the Intelligent Sector tab you can choose to save only the disk sectors containing data in your backup file, which will speed up the backup creation process and output a smaller image file.
Finally, VSS is a technology provided by Microsoft that allows you to backup Windows without interrupting any running processes.
The default setting is recommended, but if you run into any problems, you can try out the Use AOMEI's built-in technique to backup without interrupting option.
How long will the backup process take?
The total time required for a full Windows backup to complete depends on how much space Windows and installed programs consume, as well as on the speed of the source disk (where Windows is installed) and the destination disk (where the image is saved).
If for example, Windows is installed on an SSD and the backup is stored in a USB 3.0 flash disk, you would have an estimated speed of about 180-190 MB/s. That would take just a couple of minutes to create the backup if your Windows installation was about 15 GB.
With a USB 2.0 though, the speeds would be significantly lower, even if Windows is installed on an SSD. In fact, the same operation would take about 45 minutes to complete, if you consider that the write speed would drop to 5-6 MB/s.
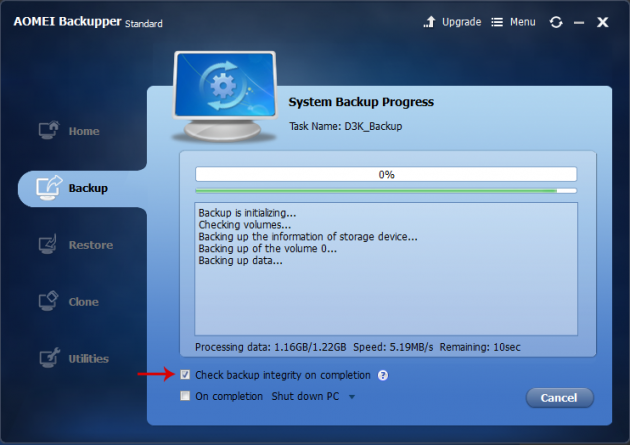
In any case, it is recommended that you enable the Check Backup Integrity on Completion which will check that the image has been created correctly and without errors, after the process is complete. Nothing could be worse than a corrupted Windows backup image when you need it.
When the process reaches 100% and you receive a success message, your complete Windows backup is ready.
Creating bootable media
In many cases you will need to restore your Windows backup when you cannot access Windows. Therefore, it is important that you have already set up a bootable media for this particular case.
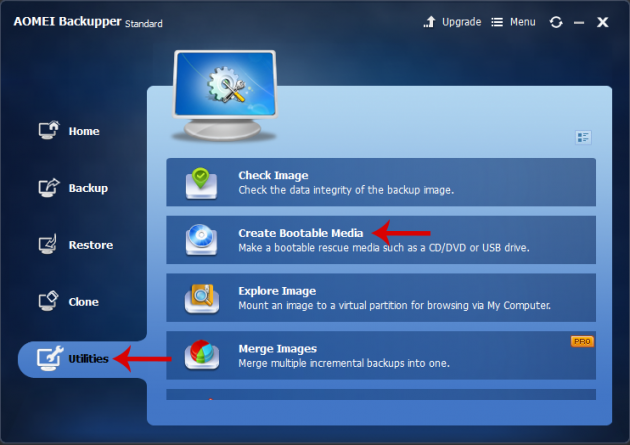
To do that, navigate to the Utilities menu from the sidebar and click on Create Bootable Media.
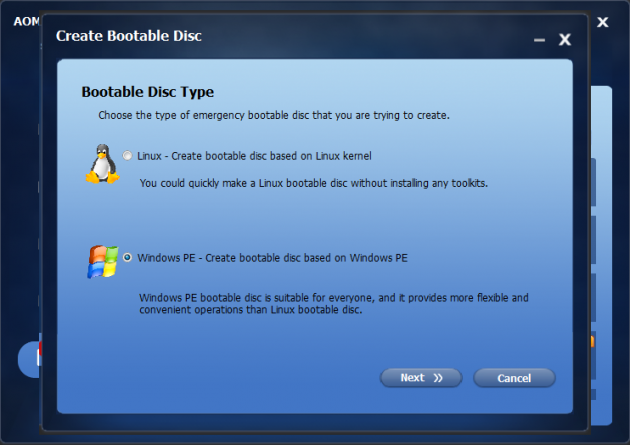
AOMEI Backupper gives you the option to select between creating a bootable disk based on Linux or Windows PE environment. Surprisingly, these two boot media are do not have equal features; Windows PE environment has significantly more features, and is the best choice.
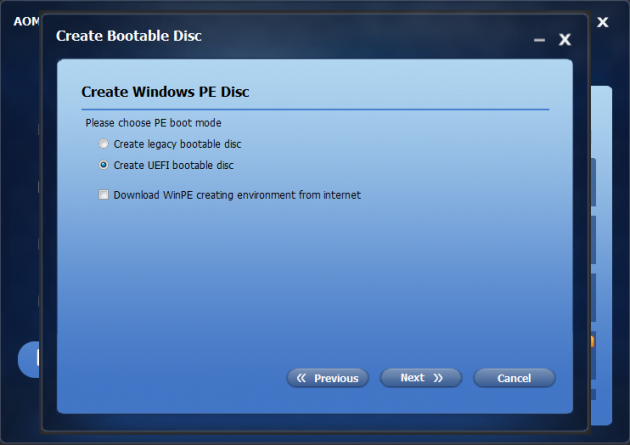
Then you will be asked whether you want to create a legacy bootable media, or a UEFI bootable media. If your computer is using Windows 8.1 or 10, then it's highly likely that it supports UEFI, so go for that. If, however, you're planning on using this bootable media in multiple computers with different hardware setups, then choose legacy.
AOMEI allows you to create a bootable CD or DVD directly, create a bootable USB, or export an ISO file. If you decide to select the bootable USB option, make sure that it does not contain the backup image that you created later, or any other files that you need.
Then, the application will format the USB after you click Yes.
In just a few minutes, the bootable USB will be ready. Now you can use it to boot your computer.
Restoring Windows backup from the bootable media
In the event that your Windows installation becomes corrupted and you need restore your backup, first boot your computer from the bootable media that you created. This can be configured from within your computer’s BIOS/UEFI settings.
Once you boot from the bootable media, the interface of AOMEI Backupper will be displayed. From there, all you have to do is locate your Windows backup image in the disk that you stored it and then let the application take care of the rest.
When the restoration process is finished, you will be able to log into Windows normally, as if you turned back time to the point where you had created the backup.
Does AOMEI Backupper support creating backups for other operating systems?
Unfortunately, AOMEI Backupper does not support non-Windows operating systems, such as Linux distributions. However, Linux users can use the excellent Clonezilla application, which will be covered in detail in a future article.
If you have any suggestions, problems or thoughts, let us know in the comments section below!


